 tessera
Cameras on a screen
A Tessera screen can show pictures from your Home Assistant cameras: on a tile, full screen, and on an alert when someone rings the doorbell. Inside Home Assistant, the app that does this is called ESP Screen Manager, and its panel in the sidebar is ESP Screens.
The screens show still pictures that refresh every few seconds, not video.
What you can do
| Where | What you see | How often it changes |
|---|---|---|
| A camera tile | The camera's icon and name, or a live picture that fills the tile | Every 5, 10, 15 or 30 seconds, your choice |
| Full screen | Tap a camera tile: the picture over the whole screen | Every 4 seconds while it is open |
| An alert | The picture of that moment on the alert card | It stays that picture; tap it for the live view |
| A media player | The album cover of what is playing | When the track changes |
Any camera.* entity works, and so does an image.* entity, such as the snapshot a doorbell or
motion integration keeps of its last event.
Which boards
Camera pictures need a screen with extra memory. That is every screen except three.
| Shows camera pictures | No camera pictures |
|---|---|
| Guition 4-inch (ESP32-S3-4848S040) | CYD (ESP32-2432S028) |
| Guition 7-inch (JC1060P470 and JC1060P470 V2) | Waveshare 3.5-inch (ESP32-S3-Touch-LCD-3.5) |
| Guition 10.1-inch (JC8012P4A1) | Hosyond 4-inch (ESP32-32E E32R40T) |
| Waveshare 4-inch (ESP32-S3-Touch-LCD-4B) | |
| Waveshare 4.3-inch (ESP32-S3-Touch-LCD-4.3) | |
| Waveshare 7-inch (ESP32-S3-Touch-LCD-7) |
On a screen without camera pictures:
- A camera can't be a tile. Saving a page with one says "This screen cannot show camera pictures."
- An alert with a camera still shows, without the picture.
- The media card shows the player's icon instead of the album cover.
A live picture on a tile
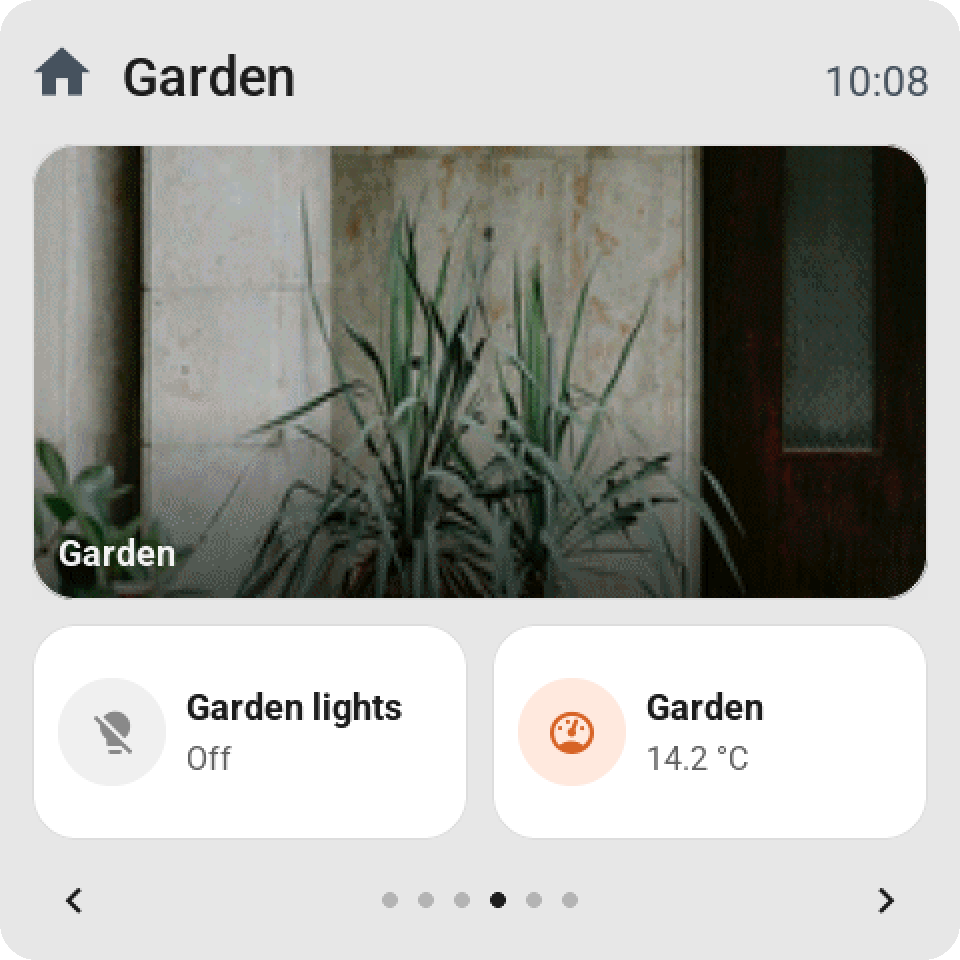
- In ESP Screens, open your screen and add a camera as a tile, or pick one that is already there.
- In the tile's settings, set Display to Live picture.
- Choose Refresh: every 5, 10, 15 (the default) or 30 seconds.
- Choose Picture:
- Fill the tile (the default) cuts the picture to the tile, the way a photo fills a frame.
- Whole picture shows all of it, with black bars above and below or at the sides.
- Choose On the picture: Name (the default) writes the tile's name at the bottom, and Nothing leaves the picture clean.
- Click Save & send.
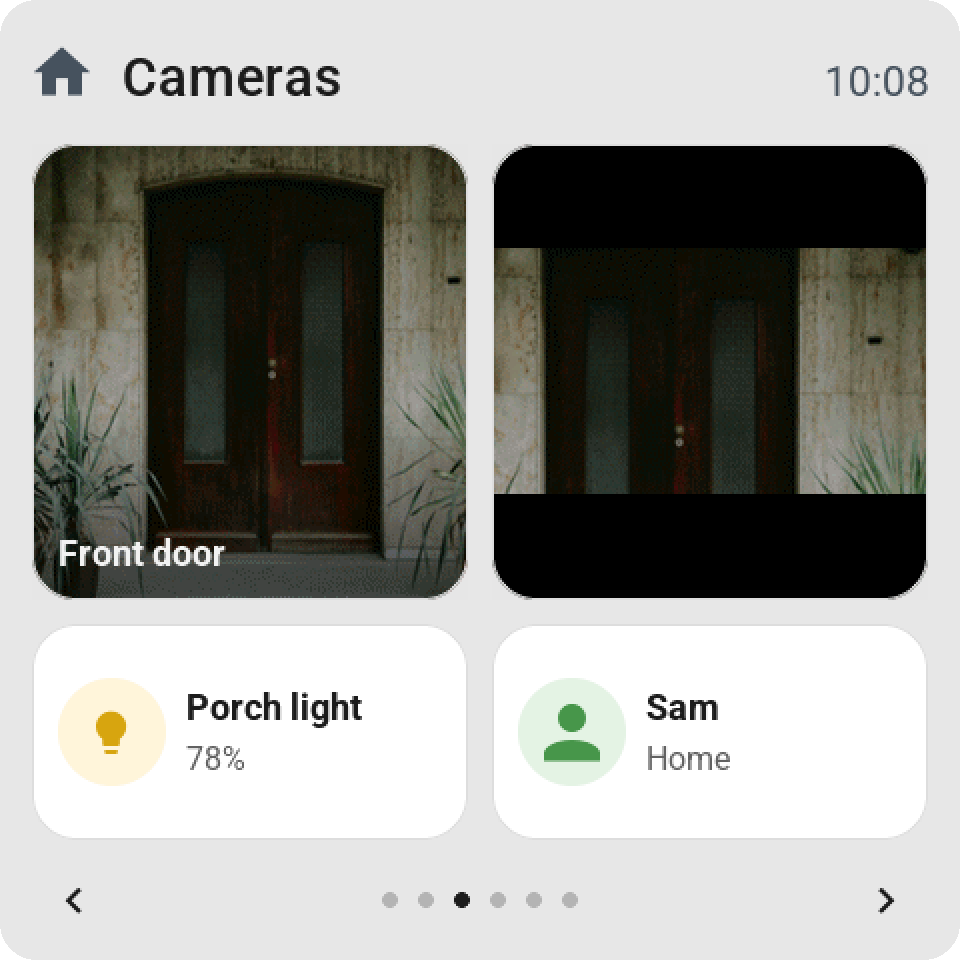
What you'll see: a spinner in the tile until the first picture arrives. Then the picture fills the tile. It refreshes while that page is on the screen. It stops when you turn to another page or the screen goes to standby. A tap opens the camera full screen.
The picture fills the tile on every size: a normal tile, a double-width tile, 1 × 2, 2 × 2 and a full page. Two cameras that film in wide 16:9 fit side by side on a 4-inch screen, one normal tile each.
This needs app 0.3.13 and screen firmware 0.3.7 or newer. Older firmware shows a small square of the picture in the icon's place instead. Update the ESP Screen Manager app first, then update each screen.
Good to know
- Turn back to a page and its last pictures are there at once. The next refresh follows at the tile's own pace.
- The app makes each picture exactly as large as the tile, so the screen never gets more than it shows. What sets the pace is the refresh you choose, and how quickly your camera hands Home Assistant a snapshot.
- A refresh every 5 seconds works well on a 4-inch screen. The bigger the tile and the slower your Wi-Fi, the longer each picture takes.
- A camera that only streams, and has no snapshot for Home Assistant, keeps its icon and name like any other tile.
The camera full screen
Tap a camera tile to open its picture over the whole screen. The round back key at the top left closes it. The picture refreshes every 4 seconds while it is open, and closes by itself in standby.
An alert with a picture
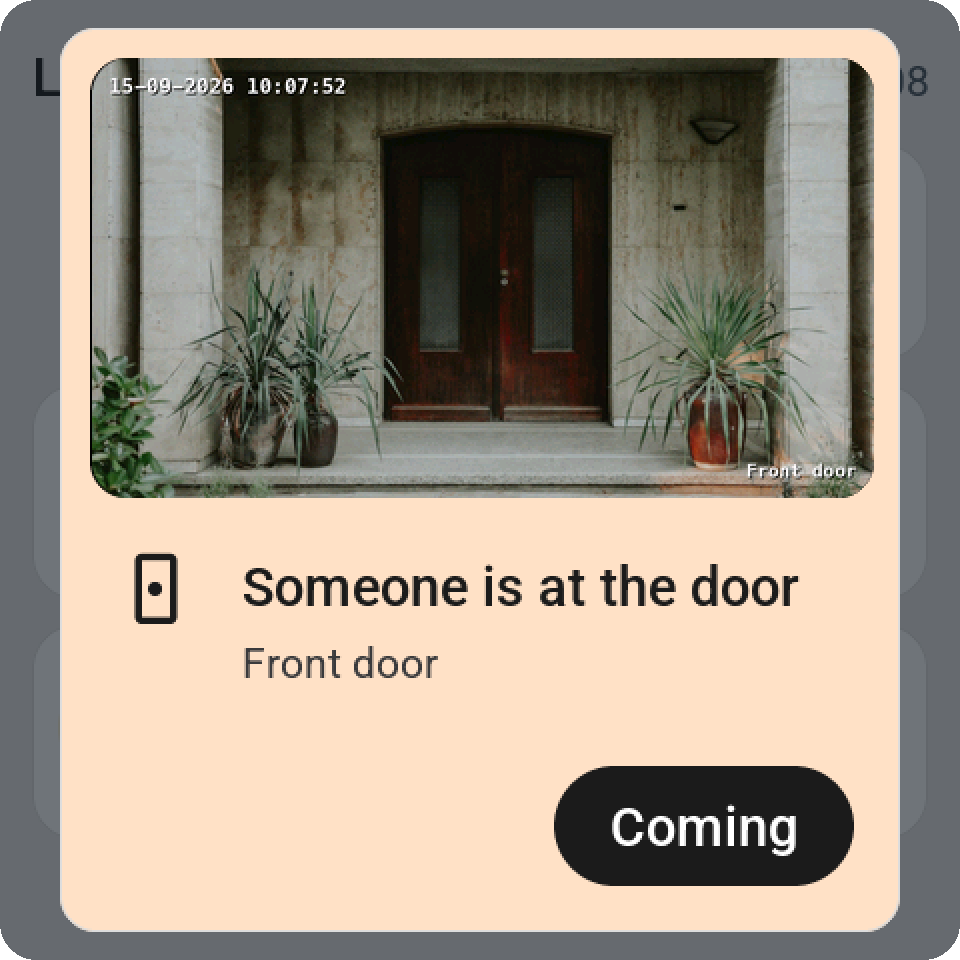
To show an alert on the screens, send the esp_screens_show_alert event as a step in an automation
or a script. Add camera to put a picture on it:
triggers:
  - trigger: state
    entity_id: event.front_door_ding
actions:
  - event: esp_screens_show_alert
    event_data:
      title: Someone is at the door
      icon: doorbell
      camera: camera.front_door
      timeout: 60
What you'll see: the alert card with the picture of that moment. A wide camera sits across the top of the card. A square or standing doorbell camera sits beside the text on a wide, low screen. Until the picture arrives the card shows a camera icon in its place. Tap the picture to open the camera full screen, and Back returns to the alert.
- One screen only: add
screen:with the screen's name, for examplescreen: hallway_screen. A room name reaches every screen in that room, and a list such as[hallway_screen, kitchen_screen]reaches several. - Use the event, not the screen's own action. Each screen also has its own action,
esphome.<screen>_show_alert, but that action has nocamerafield. (Home Assistant makes every field of a screen's action required, so adding one would break every automation that already uses it.)
Two buttons and a picture
An alert can offer a choice with a picture too. Add button2_text for a second button, and
button2_action for what it does. button_color and button2_color give each button its own colour.
actions:
  - event: esp_screens_show_alert
    event_data:
      title: Someone is at the door
      icon: doorbell
      camera: camera.front_door
      button_text: Open
      button_color: green
      action: script.open_gate
      button2_text: Not now
      button2_color: red
Two buttons need screen firmware 0.3.3 or newer; older screens show the first button only. The screen's
own action for two buttons, esphome.<screen>_show_alert_choice, has no camera either, so use the event.
All alert fields are in the extended README.
Network: port 8098
The screens load their pictures from the app on port 8098. The screen never talks to Home Assistant about pictures and never holds a Home Assistant token.
- Home Assistant OS: the app opens port 8098 on your Home Assistant machine. Keep it at 8098 in the app's network settings, and make sure the screens can reach Home Assistant's address on that port.
- Docker: see Docker. The container uses the host network, so port 8098 is open as is.
If the screens reach your host under another address, set
SCREEN_CAMERA_URL, for examplehttp://192.168.1.20:8098. - Pictures travel unencrypted over your local network, like the screens' other traffic. Each link is random, short-lived, and only made for a camera on that screen's tiles or in a recent alert.
If a camera tile keeps spinning or an alert shows no picture, check first that the screen can reach port 8098 on your Home Assistant machine.
The album cover on the media card
Tap a media player's tile, or make it a Full page tile, and the media card shows the album cover of what is playing, with the title, artist, album, a progress bar and the playback keys.
On a normal or double-width media player tile you can also set Display to Album cover: the cover takes the icon's place, like on Home Assistant's own tile. A tap still opens the card.
A cover is fetched once per track. A player without a picture, such as a radio station or a player that is off, keeps its icon.
Advanced: how it works
- The screen asks the app for the pictures it needs, or the app sends an alert's picture by itself.
- The app fetches the snapshot from Home Assistant with its own access, the same picture the Home Assistant dashboard shows.
- It prepares the picture at exactly the size the screen draws it: cut or fitted, with rounded corners and, under a name, a soft shade that keeps the white text readable. The screen only has to draw it.
- The screen loads it from port 8098.
The pictures use a simple image format (BMP) that the screen can draw while it is still downloading, so it keeps answering your touches. Live tile pictures use 256 colours, which cuts their size to a third at about the quality the screen can show anyway. A slow camera makes the pictures a little older, never the screen slower.
Details for developers are in CAMERA.md on GitHub.