 tessera
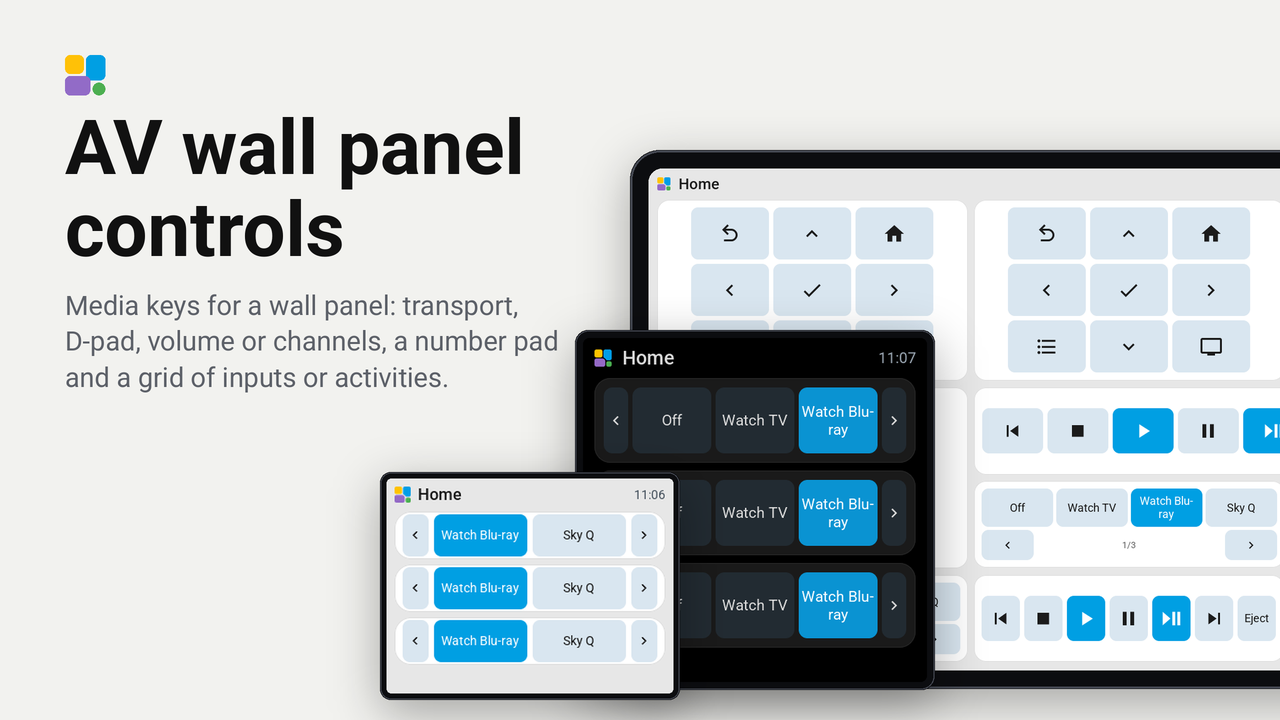
AV wall panel controls
Media keys for a wall panel: transport, D-pad, volume or channels, a number pad and a grid of inputs or activities.
Media controls for a panel screwed to the wall instead of a remote in the hand. Think of a conference room where the presenter needs the display's input, volume and menu without hunting for a remote, a sports bar where staff switch each TV to the right match and channel, a restaurant or lounge with background music and a screen behind the bar, a hotel or holiday-let lounge, a cinema room, or a shop-floor display.
The plugin adds five tiles to Tessera, to use side by side on one panel or one at a time:
| Tile | What it is for | Sizes |
|---|---|---|
| Transport controls | skip back, stop, play, pause, play/pause, skip forward, eject | 1x1 to 9x1 |
| D-pad | arrows round OK, with back, home, menu and guide | 1x1 to 3x3 |
| Volume and channel controls | quieter, mute, louder; or channel down and up | 1x1 to 3x3 |
| Number pad | channels, TV or camera numbers (not PIN codes) | 1x1 to 4x4 |
| Selector grid | a selector's options as keys: inputs, activities, sound modes | 1x1 to 4x4 |
They are bespoke: every key runs exactly the Home Assistant action you type, on exactly the entity you choose (the selector grid takes its options and actions from the entity itself). So they work with anything Home Assistant can reach, including devices where Tessera's built-in tiles and remote card do not fit: an IR or Broadlink blaster, a Harmony hub, a streamer behind a script, a projector on a serial bridge, an LG webOS or Samsung TV. The keyed tiles share one way of writing an action, so learning one means knowing them all, and every tile starts at one cell so it fits any layout. Keys are never smaller than a finger allows on that screen; a larger tile gives them more room.
Tried on: the plugin bench (Tessera's own firmware, built for a computer) on the CYD, the 4-inch Guition, the 4.3-inch Waveshare standing up and the 10.1-inch Guition, light and dark; and on real screens: the 4-inch Guition (with an LG webOS TV for the number pad) and the 8-inch Seeed reTerminal D1001.
Set up
- In Tessera, open Plugins, choose AV wall panel controls and tick your screens. Each screen builds once with the plugin.
- In Layout, place the tiles you want from the library's Plugins group, and size them by their edges.
- In the inspector, choose each tile's entity (a media player, a remote, a helper, a script and so on) and type the actions of its keys (below). The selector grid needs only its entity.
- Make sure the screen may perform Home Assistant actions. Tessera turns this on for a screen it added to Home Assistant; for a screen added by hand, tick Allow the device to perform Home Assistant actions in the ESPHome integration's options for that device.
What a key's action can say
A key's text is the action, then optionally an entity of its own, then optionally one field, separated by spaces:
media_player.media_play: the action, on the tile's entity.remote.send_command command=EJECT: the action with one field, on the tile's entity. The value runs to the end of the text, so it may contain spaces.script.turn_on script.eject_disc: the action on another entity than the tile's.remote.send_command remote.hall command=up: both.
A key whose text is not an action shows in red, and a tap sends nothing. At most 64 characters per key, and one field:
for an action that needs more, write a script in Home Assistant and give the key script.turn_on script.<its name>.
Transport controls
A strip of media keys on one row: skip back, stop, play, pause, play/pause, skip forward and eject. Each key performs the Home Assistant action you give it, so the same tile drives a media player, a Blu-ray player behind an IR remote, or anything a script can reach.
Give a key an action and it appears; leave it empty and it is left out. The keys always keep this order and sit together in the middle of the tile. The tile is one cell at least and grows as wide as the page, but never taller than one row. On a tile too narrow for the keys side by side, they wrap onto two or three rows.
Eject is not in Tessera's icon set yet, so its key shows the word Eject; it will take the icon when the set has it.
Actions for each key, for example:
| Key | Media player | IR remote (Broadlink and the like) |
|---|---|---|
| Skip back | media_player.media_previous_track |
remote.send_command command=PREVIOUS |
| Stop | media_player.media_stop |
remote.send_command command=STOP |
| Play | media_player.media_play |
remote.send_command command=PLAY |
| Pause | media_player.media_pause |
remote.send_command command=PAUSE |
| Play/pause | media_player.media_play_pause |
remote.send_command command=PLAY_PAUSE |
| Skip forward | media_player.media_next_track |
remote.send_command command=NEXT |
| Eject | (a media player has no eject) | remote.send_command command=EJECT |
On the screen
- A tap on a key lights it blue while the action goes out, or red when it could not be sent (no entity, no action, or the screen may not perform actions).
- With a media player as the tile's entity, the key of what it does is lit: play and play/pause while it plays, pause while it is paused. The icons go grey while the entity is unavailable.
- Works on every board, the CYD included. On a single cell, or with all seven keys on a small screen, the keys wrap onto more rows or get smaller; make the tile wider to give them more room.
D-pad
The navigation keys of a remote on one tile: up, down, left and right round an OK key, with back, home, menu and guide in the corners. Each key performs the Home Assistant action you give it, so the same tile drives a streamer, a Blu-ray player behind an IR remote, a set-top box, or anything a script can reach.
It differs from Tessera's own remote card, which opens when you tap a remote tile and shows a ready-made keypad (arrows, OK, Back,
Home, Play/Pause and volume) for the integrations Tessera knows, such as Android TV, Apple TV and Roku. Use that where
it fits; use this tile where it does not (Harmony and Broadlink remotes, for example, have no built-in keypad), or when
you want the keys on the page itself, in one tap, with your own commands.
Give a key an action and it appears; leave it empty and it is left out, and its place stays empty so the other keys do not move. The keys sit in a block of three by three in the middle of the tile. A key is never higher than 14 mm nor wider than half again its height, so a bigger tile only gives them room. The tile is one cell at least and up to 3x3.
 back   up    home
 left   OK    right
 menu   down  guide
Actions for each key, for example:
| Key | Remote |
|---|---|
| Up | remote.send_command command=UP |
| Down | remote.send_command command=DOWN |
| Left | remote.send_command command=LEFT |
| Right | remote.send_command command=RIGHT |
| OK | remote.send_command command=OK |
| Back | remote.send_command command=BACK |
| Home | remote.send_command command=HOME |
| Menu | remote.send_command command=MENU |
| Guide | remote.send_command command=GUIDE |
On the screen
- A tap on a key lights it blue while the action goes out, or red when it could not be sent (no entity, no action, or the screen may not perform actions).
- The icons go grey while the entity is unavailable.
- Works on every board, the CYD included. On a single cell the keys get small; make the tile bigger to give them more room.
Volume and channel controls
Three volume keys on one tile: quieter, mute and louder, or, with the Channel style, two keys for channel down and up. Each key performs the Home Assistant action you give it, so the same tile drives a media player, an amplifier behind an IR remote, or anything a script can reach.
Give a key an action and it appears; leave it empty and it is left out, and the keys that are there share the room. They sit together in the middle of the tile:
- On a tile as wide as it is high or wider (1x1, 2x1, 2x2 and so on) they stand across, as minus, mute, plus.
- On a tile taller than it is wide (1x2, 1x3) they stand down, louder at the top, then mute, then quieter.
A key is never higher than 14 mm nor wider than half again its height, so a bigger tile only gives the keys room. The tile is one cell at least and up to 3x3.
Actions for each key, for example:
| Key | Media player | IR remote or amplifier |
|---|---|---|
| Quieter | media_player.volume_down |
remote.send_command command=VOLUME_DOWN |
| Mute | media_player.volume_mute is_volume_muted=true |
remote.send_command command=MUTE |
| Louder | media_player.volume_up |
remote.send_command command=VOLUME_UP |
Volume or channel: the Style option
Style chooses what the keys look like. Volume, the default, is everything above. Channel uses the same tile for channel down and up: the Quieter key becomes channel down and the Louder key channel up, drawn as chevrons (left and right across a tile, down and up in a column), and the mute key is left out whatever it holds. The actions are still whatever you type, so the tile is as bespoke as before.
Put a volume tile and a channel tile on one page if you like: both are tiles of this plugin.
| For | Channel down | Channel up |
|---|---|---|
| An LG webOS TV | webostv.button button=CHANNELDOWN |
webostv.button button=CHANNELUP |
| An IR or Android TV remote | remote.send_command command=CHANNEL_DOWN |
remote.send_command command=CHANNEL_UP |
| A media player on Live TV | media_player.media_previous_track |
media_player.media_next_track |
The last row follows the integrations' own behaviour (on an LG TV on Live TV, next and previous track change channel); check it on your own device. The command names of a remote depend on its integration or learned codes.
On the screen
- A tap on a key lights it blue while the action goes out, or red when it could not be sent (no entity, no action, or the screen may not perform actions).
- With a media player as the tile's entity, the mute key is lit while the player is muted.
- The icons go grey while the entity is unavailable.
- One tap sends one step: the tile does not repeat while a finger is held, because a plugin's tile only gets taps. How big a step is depends on the integration.
- Works on every board, the CYD included. On a single cell of a small screen the keys get small; make the tile bigger to give them more room.
Limiting the volume
The tile sends the actions you give it and has no volume limit of its own. Home Assistant has no built-in per-player limit either, so where a top or bottom level matters (a shop, a bar, a conference room, a child's room), put the limit where it cannot be skipped. From the strongest:
-
On the device. Many amplifiers, receivers and speakers have a "maximum volume" setting in their own app. The hardware enforces it whatever sends the command, whether this tile, Home Assistant or the device's own remote.
-
A wrapper player in Home Assistant. The Universal media player can replace a player's
volume_set,volume_up,volume_downandvolume_mutecommands. Point the tile's entity (or each key) at the wrapper instead of the real player. An untested sketch that keepsvolume_setbetween 20 % and 60 %:media_player: - platform: universal name: Clamped receiver children: - media_player.receiver commands: volume_set: action: media_player.volume_set target: entity_id: media_player.receiver data: volume_level: "{{ [[volume_level, 0.2] | max, 0.6] | min }}" attributes: volume_level: media_player.receiver|volume_levelThe docs do not describe clamping, so check it on your own system. A plain
volume_uporvolume_downsteps by whatever the integration decides and can pass the limit, so override those too, or give the keys a script that checks the level first (script.turn_on script.volume_up_limited). -
Put it back afterwards. A blueprint such as Media Player - Volume limit watches
volume_leveland resets the player when it goes above a limit. It reacts after the fact, so there is a short spike, and it covers the upper limit only.
A slider on Tessera's own volume tile can be limited with an input_number helper: Home Assistant enforces the
helper's minimum and maximum, and an automation copies its value to the player. That limits the slider only, so use it
together with one of the above.
Number pad
The keys 0 to 9 on one tile, with an optional Clear and Enter, for any number a Home Assistant action takes: a TV channel, the TV to switch to in a bar, a camera to bring up on a screen, a preset, a room. You type one action with the number's place marked in it, and choose when it is sent.
It is not for PIN codes. Tessera's own lock and alarm tiles open a keypad of their own that shows dots, counts wrong codes, locks the keypad after repeated mistakes and never stores or logs the code. This tile has none of that, so leave codes for locks and alarms to the built-in keypad.
The keys follow a telephone's layout (1 2 3, 4 5 6, 7 8 9, then Clear, 0 and Enter) where they come out large enough. On a wide, low tile they go in rows of four or six instead, with Clear and Enter at the end. A key is never higher than 14 mm nor wider than half again its height. The tile is one cell at least and up to 4x4; twelve keys on one cell are small, so 2x2 or taller is comfortable.
The action, and where the number goes
The action text is the action, then optionally an entity of its own, then optionally one field (name=value). In the
field's value, two words are replaced when a key is tapped:
| Word | Is replaced by |
|---|---|
{digit} |
the key just tapped: 7 |
{code} |
the digits typed so far: 407 |
They work only in the field's value, not in the action's name or in the entity. A field's value runs to the end of the text and may hold spaces. At most 64 characters once the number is in it.
When it is sent
Each digit sends the action as soon as a digit is tapped. This is right when the device collects the digits itself, as a TV does for a channel:
| For | Action | Enter's action |
|---|---|---|
| An IR or Android TV remote | remote.send_command command=NUM_{digit} |
remote.send_command command=ENTER |
An LG webOS TV collects the digits itself, so it suits this mode. Choose the TV's media player as the entity, then:
| For | Action | Enter's action |
|---|---|---|
| An LG webOS TV (LG webOS integration) | webostv.button button={digit} |
webostv.button button=ENTER |
The TV must be on, and the entity you choose must be the live one (an old registration of the same TV does nothing).
In this mode an Enter key needs an Enter's action of its own. {code} is also available, as the digits tapped so far.
On Enter gathers the digits, shows them above the keys, and sends the whole number when Enter is tapped. This is right when one action takes the whole number, which is how to switch between TVs or cameras:
| For | Action |
|---|---|
| A helper that an automation reads | input_number.set_value value={code} |
| A text helper | input_text.set_value value={code} |
| A choice that takes the number | input_select.select_option option=TV {code} |
| A media player's source | media_player.select_source source=Input {code} |
A tile can send only one field, so for anything more, point the action at a helper and let a Home Assistant automation (or a script it triggers) do the rest: it sees the number arrive and switches the TV, the camera or the channel.
Enter with nothing typed does nothing and shows red. If Enter's action is filled in, Enter sends that instead of the action above; use it to send the number somewhere else, or a plain Enter command.
On the screen
- A tap on a key lights it blue while the action goes out, or red when it could not be sent (no entity, an action that is not one, or the screen may not perform actions). An action that is not one shows every digit in red.
- Most digits (1 to 8, default 3): on Enter, further digits are refused; sending each digit, the next one starts a new number.
- Forget after (default 10 seconds, 0 for never): digits typed and not sent are forgotten after this time without a tap, so the next person starts afresh. Clear empties them at once, and sending the number does too.
- Show the number (on Enter): the digits typed so far above the keys. Turn it off to give the keys the room.
- The keys go grey while the entity is unavailable.
- Works on every board, the CYD included. Where a tile is small, the keys are small; give it more room.
Selector grid
Every option of a selector on screen at once, as a grid of keys. Tessera's own tile for a selector shows the option in use and opens a list when you tap it; this tile keeps all the options on the page, so one tap picks one. Use it to choose the input of a TV or amplifier, an activity (Watch TV, Blu-ray, Music), a sound mode, or any list of favourites you keep in a helper.
It works with anything that has a list: the options come from the entity itself, so there is nothing to type. The option in use is lit, and follows the entity when it changes anywhere else: on another screen, from a remote, or from an automation.
When the options do not all fit at a comfortable size, a strip along the bottom of the tile holds an arrow either side of the page number: tap the left half to go back a page, the right half to go on (from the last page round to the first). The tile opens on the page of the option in use. A key is never smaller than a finger (about 16 x 9 mm) and the tile shows at most twelve at once, so a larger tile shows more of them per page. The tile is one cell at least and up to 4x4; a single cell shows one or two options a page, so 2x1 or 2x2 is where it shines.
Where the options come from
The tile reads the list from the entity you choose and sends the matching action when a key is tapped:
| Entity | Its options | The one in use | A tap sends |
|---|---|---|---|
input_select (a helper) |
options |
its state | input_select.select_option option=<the key> |
select |
options |
its state | select.select_option option=<the key> |
media_player |
source_list, its inputs |
source |
media_player.select_source source=<the key> |
remote (a Harmony hub and others) |
activity_list |
current_activity |
remote.turn_on activity=<the key> |
The names on the keys are the options exactly as Home Assistant has them. To use your own words, or a list Home
Assistant does not give (favourites, a set of TV channels, the cameras of a CCTV wall), make an input_select helper with
those options and an automation that acts on it when it changes.
Example: activities, Harmony-style
Keep the activities of a room in an input_select helper (Off, Watch TV, Watch Blu-ray, Music) and let an automation, or
a blueprint such as WHARP's Start Activity, start the activity when the helper changes: turn the devices on, switch the
inputs, set the volume. Point a Selector grid at the helper, leave out Off if you have a separate power key, and every
activity is one tap away on the wall. The key of the activity that is running stays lit, whether it was started from the
panel, from a remote or by an automation.
On the screen
- The option in use is a blue key. A tap lights the key blue while the action goes out, or red when it could not be sent (no entity, or the screen may not perform actions).
- Words on a key take up to two lines where the key is high enough, one line where it is not, and end in dots when they do not fit.
- The keys go grey while the entity is unavailable. Many TVs give no inputs while they are off; the tile then says there are no options to show until the TV is on.
- Works on every board, the CYD included. Where a tile is small, it shows fewer options a page; give it more room.
Good to know
- A key runs whatever action you type for it, on whatever entity you name. The manifest lists the actions the tiles are made for, but the screen does not hold a key to that list: anyone who can edit the layout can make a key perform any action the screen is allowed to. The selector grid sends only its four selecting actions.
- A tile only gets taps: no key repeats while a finger is held, and no tile scrolls (a swipe on a Tessera screen changes the page). The selector grid pages with taps instead.
- Nothing is stored and nothing leaves your home: the tiles use no internet service and no Home Assistant entity but the ones you choose. The number pad keeps the digits typed only until they are sent or forgotten.
How it works
tessera-plugin.yaml: five tiles (transport,dpad,volume,numpad,grid), each belonging to an entity of the domains it acts on, with an option per key.components/av_wall_panel_controls/panel_command.h: reads a key's text into an action, a target and a field; one parser for every keyed tile.- One file per tile (
transport.cpp,dpad.cpp,volume.cpp,numpad.cpp,grid.cpp), each in a namespace of its own: it lays its keys out in the middle of the tile, finds the key under the finger (tessera::tap_point) and sends its action (tessera::action). The selector grid reads the entity's list attributes and keeps its options in the screen's PSRAM where the board has it.